


SEAT BELTS - Rear Seat Center 3- Point System With Emergency Locking Retractor
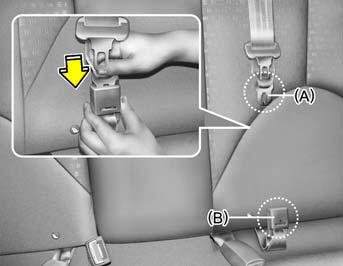
1. Before fastening the rear seat center belt, confirm the metal tab (A) and buckle (B) are latched together.
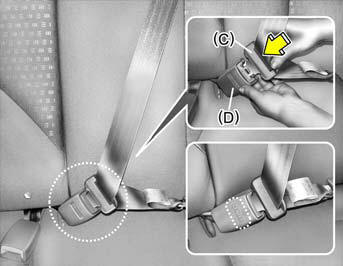
2. After confirming that (A) and (B) are latched, pull the seat belt out of the retractor and insert the metal tab (C) into the buckle (D).
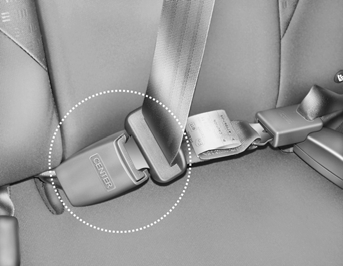
NOTE:
Confirm the metal tab and the buckle marked "CENTER" are latched together.
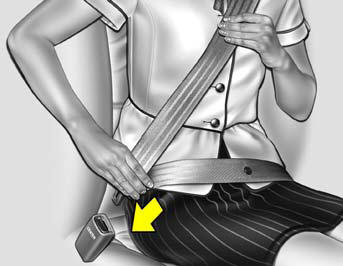
There will be an audible "click" when the tab locks in the buckle. The seat belt automatically adjusts to the proper length only after the lap belt is adjusted manually so that it fits snugly around your hips. If you lean forward in a slow, easy motion, the belt will extend and let you move around. If there is a sudden stop or impact, the belt will lock into position. It will also lock if you try to lean forward too quickly.
WARNING:
o Never let anyone ride in the rear center seat without fastening all metal tabs and buckles as described in this section. This seat belt is designed to function as a typical 3- point restraint (lap/shoulder belt). Using only the shoulder portion or lap portion of the belt can result in serious or fatal injuries in the event of a collision or sudden stop.
o Never unlock the metal tab (A) and the buckle (B) with the following exceptions.
(1) In case of folding rear seatbacks down.
(2) If transporting an object on the rear seat may cause damage to the rear seat center belt.
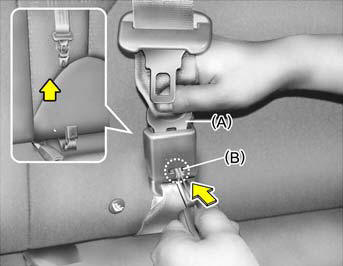
To disconnect the metal tab (A) from the buckle (B), insert a narrow-ended tool into the groove located on the buckle (B).
WARNING:
Always lock metal tab (A) into buckle (B) immediately after returning the rear seatbacks to an upright position. This portion of the rear center seat belt should only be unbuckled when the rear seatback is folded down.
To Release the Seat Belt
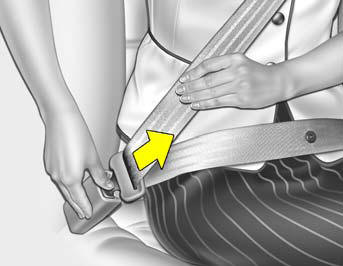
When you want to release the seat belt, press the button in the locking buckle.
WARNING:
When fastening the outboard seat belts or the center seat belt, make sure they are inserted into the correct buckles to obtain maximum protection from the seat belt system and assure proper operation.
See also:
Warnings and indicators
All warning lights are checked by turning the ignition switch ON (do not start
the engine). Any light that does not illuminate should be checked by an authorized
HYUNDAI dealer.
After starting th ...
High-Beam Switch
To turn on the headlight high beams, push the lever forward (away from you).
The High Beam Indicator Light will come on at the same time. For low beams, pull
the lever back toward you. ...
Care of cassette tapes
Proper care of your cassette tapes will extend
the tape life and increase your listening enjoyment.
Always protect your tapes and cassette
cases from direct sunlight, severely cold and
dusty con ...