

Replacement of light bulbs
Before attempting to replace a light bulb, be sure the switch is turned to the "OFF" position.
The next paragraph shows how to reach the light bulbs so they may be changed. Be sure to replace the burned-out bulb with one of the same number and wattage rating.
CAUTION:
o Keep the lamps out of contact with petroleum
products, such as oil, gasoline,
etc.
o After heavy, driving rain or washing, headlight and taillight lenses could appear frosty. This condition is caused by the temperature difference between the lamp inside and outside. This is similar to the condensation on your windows inside your vehicle during the rain and doesn’t indicate a problem with your vehicle. If the water leaks into the lamp bulb circuitry, have the vehicle checked by an Authorized Hyundai Dealer.
Headlight and Front Turn Signal Light
1. Allow the bulb to cool. Wear eye protection.
2. Open the engine hood.
3. Always grasp the bulb by its plastic base, avoid touching the glass.
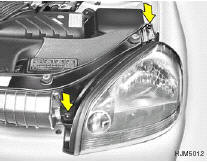
4. Using a socket wrench of the correct size, remove the headlight assembly mounting bolts.
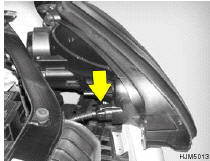
5. Disconnect the power cord from the bulb base in the back of the headlight.
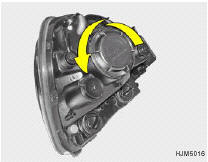
6. Turn the plastic cover counterclockwise and remove it.
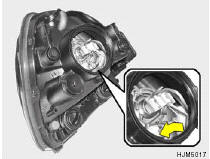
7. Disconnect the connector from the bulb base in the back of the headlight.
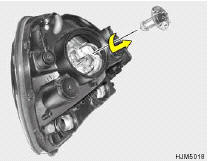
8. Push the bulb spring to remove the headlight bulb.
9. Remove the protective cap from the replacement bulb and install the new bulb by matching the plastic base with the headlight hole. Reattach the bulb spring and reconnect the connector.
10.Use the protective cap and carton to promptly dispose of the old bulb.
11.Check for proper headlight aim.
12.To replace the front turn signal light bulb, remove from the bulb holder and install the new bulb. Do not touch the glass of the new bulb.
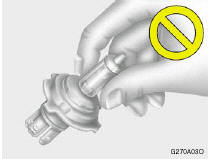
WARNING:
This halogen bulb contains gas under pressure
and if impacted could shatter, resulting
in flying fragments. Always wear eye
protection when servicing the bulb. Protect
the bulb against abrasions or scratches
and against liquids when lighted. Turn the
bulb on only when installing in a headlight.
Replace the headlight if damaged or cracked.
Keep the bulb out of the reach of children and dispose of the used bulb with care.
Rear Combination Light
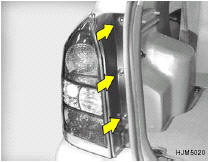
1. Open the tail gate.
2. Remove the mounting screws as shown with a phillips screwdriver.
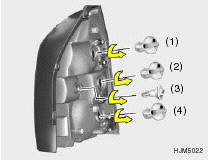
3. To replace the rear combination light (stop/ tail light, turn signal light, back-up light, side mark light), take it out from the bulb holder by turning it counterclockwise.
(1) Stop/Tail light.
(2) Turn signal light.
(3) Back-up light.
(4) Tail light.
4. Install the new bulb.
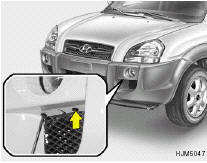
Front fog Light (If installed)
1. Remove the cover with a phillips screw driver.
2. Remove the bolts with a wrench.


3. Disconnect the power cord.

4. Replace to the new bulb.
Luggage Compartment Light (If Installed)
1. Remove the cover with a flat blade screw driver.
2. Disconnect the power cord.
3. Replace to the new bulb.
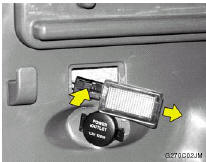
Cargo Light
1. Open the tail gate.
2. Remove the cover with a flat blade screwdriver.
3. Replace with a new bulb.
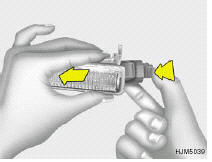
Front Side Marker Light
1. Remove the cover with a phillips screwdriver.
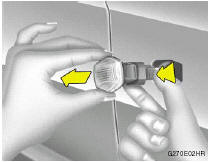
2. Disconnect the connector.
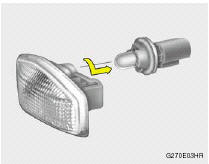
3. Replace with a new bulb.
Interior Light
1. Remove the cover with a flat blade screwdriver.

2. Replace with a new bulb.
Glove Box Illuminated Light (If installed)
1. Open the glove box.
2. Remove the cover with a flat blade screwdriver.
3. Disconnect the connector.
4. Replace with a new bulb.
See also:
Corrosion protection
Protecting Your Hyundai from Corrosion
By using the most advanced design and construction
practices to combat corrosion,
Hyundai produces cars of the highest quality.
However, this is only part of ...
Tire maintenance
In addition to proper inflation, correct
wheel alignment helps to decrease tire
wear. If you find a tire is worn unevenly,
have your dealer check the wheel alignment.
When you have new tires insta ...
To increase cruise control set speed
Follow either of these procedures:
o Push the RES/+ switch and hold it. Your vehicle will accelerate. Release the switch
at the speed you want.
o Push the RES/+ switch and release it immediately ...